

How to SSH to your Linux VM through AWS,Azure and GCP within 10 mins and call it a day 😏😏😏
How To Series (HTS) Cloud


Hello Comrades,
Well let's put those upbeat song and SSH your way to cloud Linux VM.
You're gonna carry that weight
-Cowboy Bebop
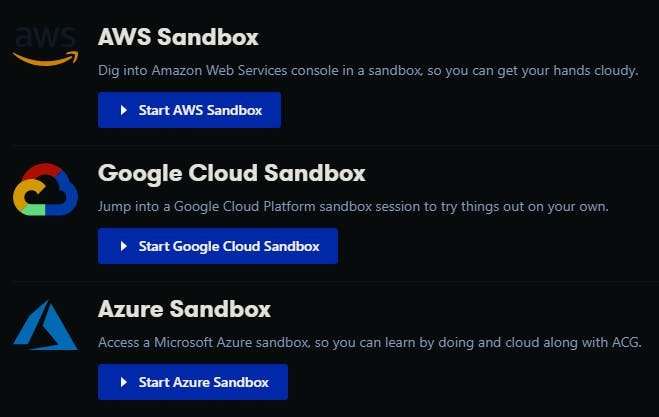
Pre-requisite
Get your basic account setup with your information and payments (debit and credit card). Voila! You will be presented with the dashboard of all three cloud platform.
AWS - See => Here for a walkthrough guide to account creation
Azure - See => Here how to get initial $200 credit for free tier account
GCP - See => Here how to get initial $300 credit for free tier account
Let's Jam!!!

Set your Timer and Let's Go

AWS - Amazon's Big Bang offering
Amazon Web Services (AWS) is one of the oldest and modest of the bunch. They have a lot of service to dive through yet still they didn't reached the apex. They including compute, storage, databases, analytics, networking, mobile, developer tools, management tools, IoT, security and enterprise applications.
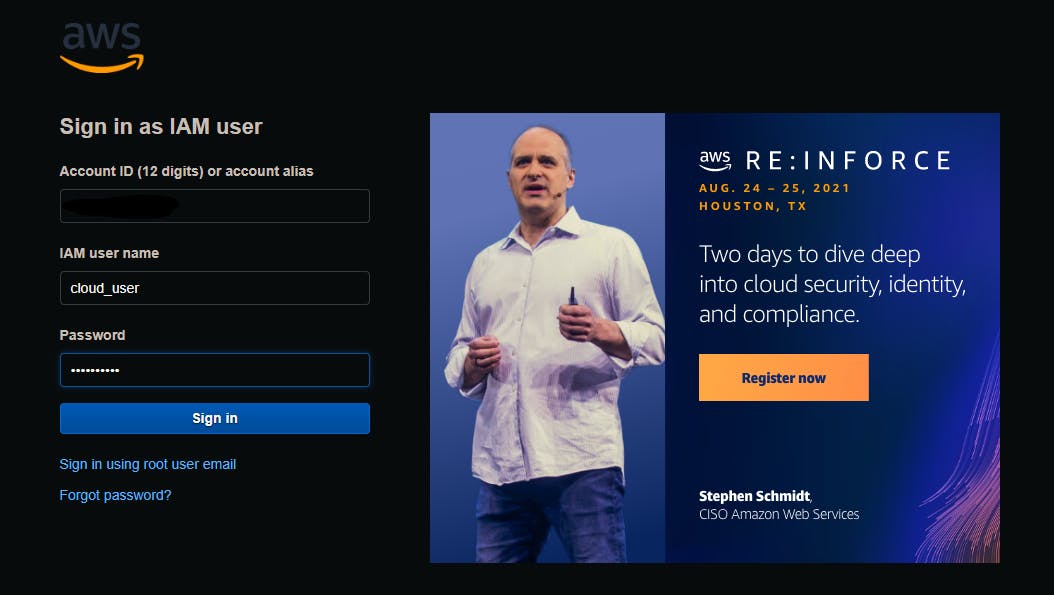
Step-1: Login your way to AWS
If you aren't already, Login with your AWS account.
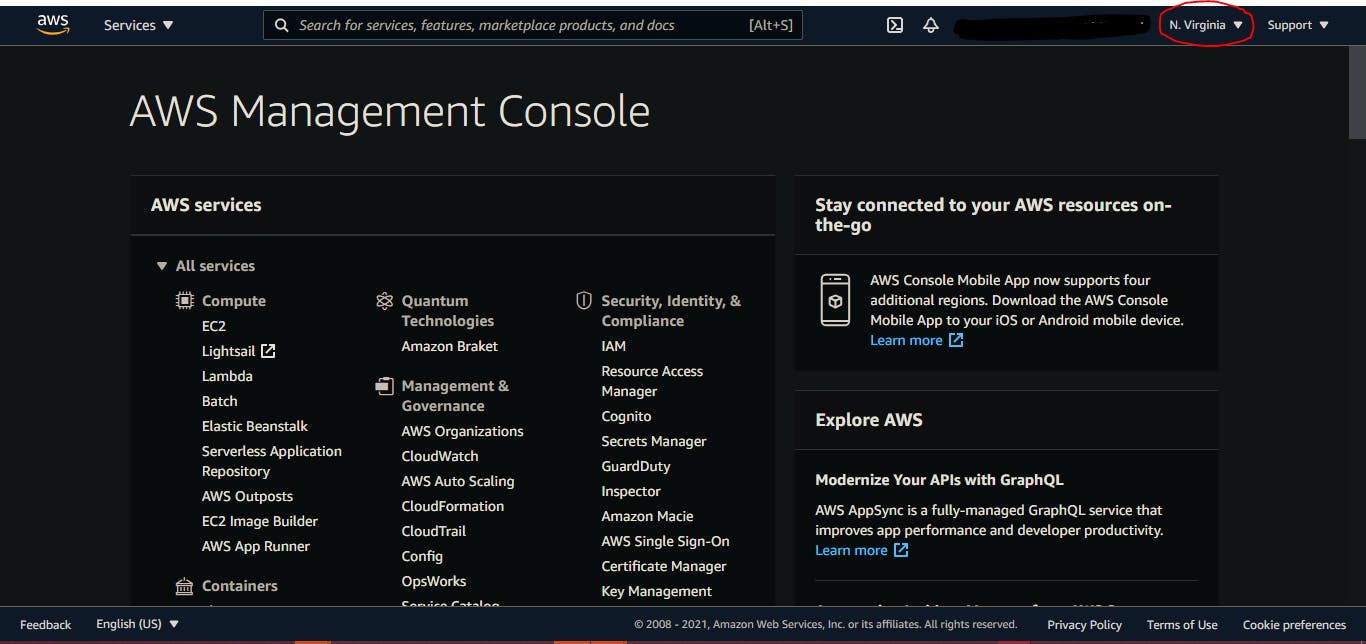
Step-2: Get a view of the console (AWS) and check your region
The AWS console is simple and easy to navigate within the services.
Step-3: Go to EC2 instance and launch
Amazon promises 2-3 mins to launch an instance, let's see if that's true.

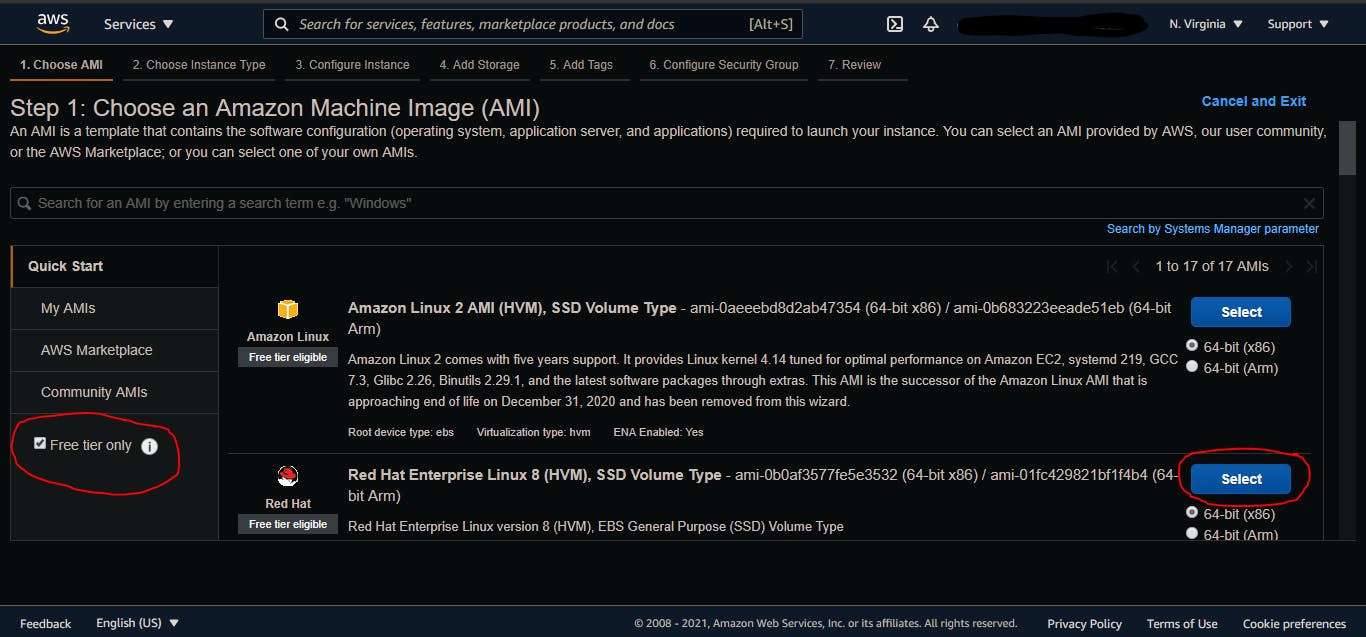
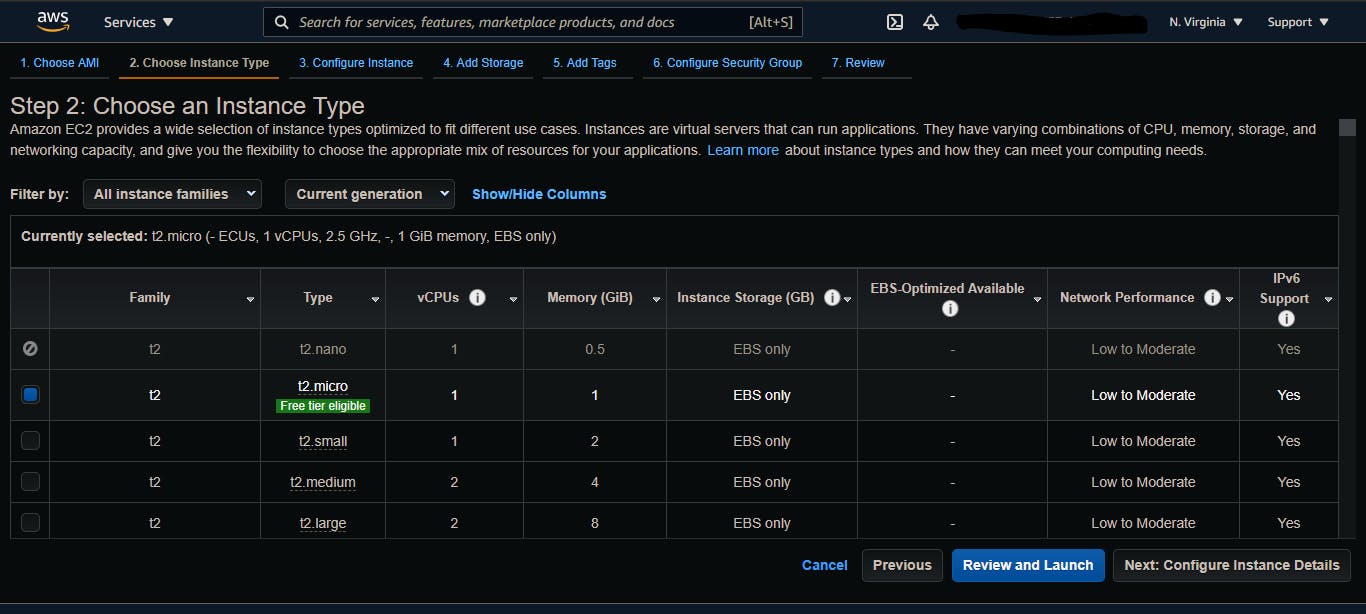
Step-4: Plethora of Image to choose
Well Amazon's AMI offering provides you an insight of most of the popular companies OS offering like Redhat,Microsoft and much more. Even you can create your own customized AMI (Amazon Machine Image)
Select free tier only if you still want to use it for free ✌✌
Step-5: Configure your instance and initial setup.
In this point you can click on Review and launch which will select the default for free tier.
Step-6: Launch your instance
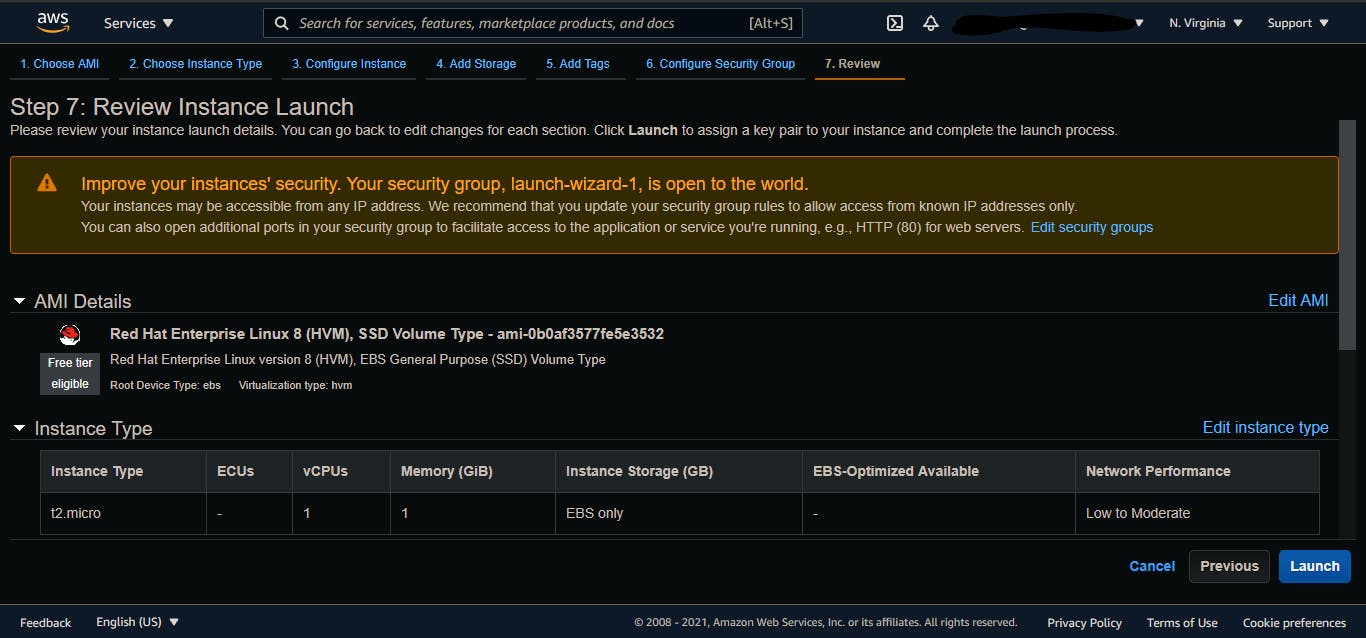
Step-7: Download a new key pair (Important step)
The pop-up dialogue box have a drop down section choose "Create a new key pair" and name it anything you desire. Save it in your desktop (Don't worry it's encrypted public key)

Now launch your instance
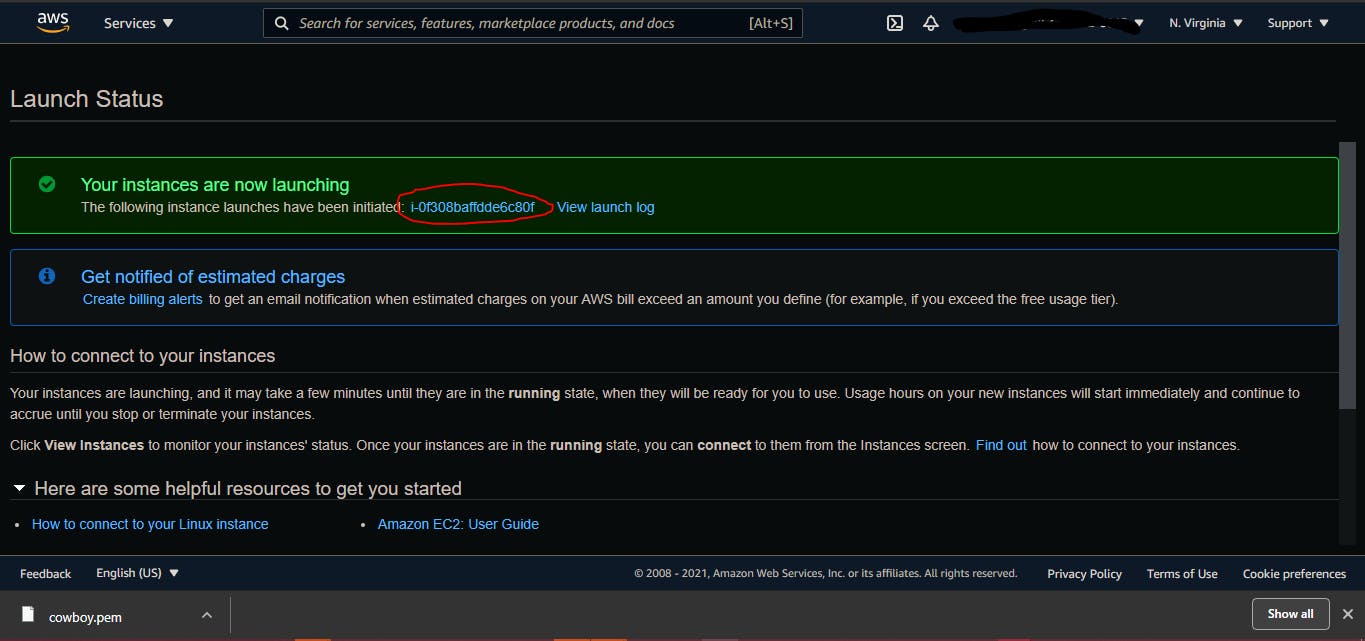
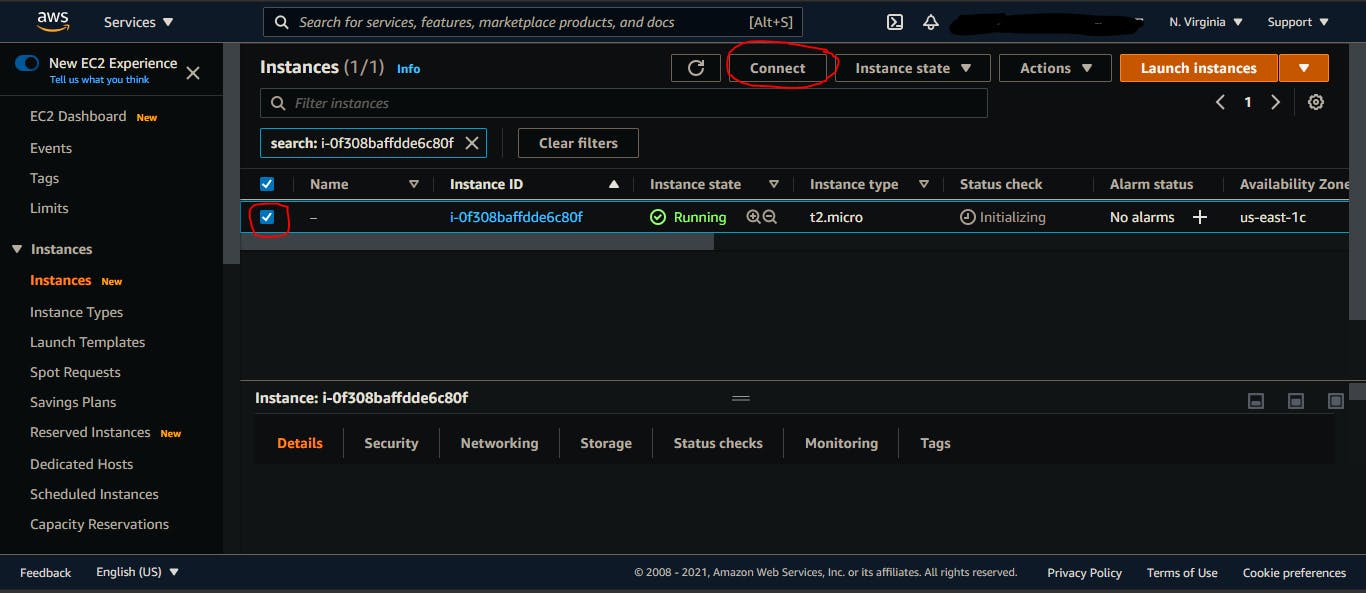
Step-8: Well Done mate! You created a Redhat 8 instance now SSH your way through it.
Tip: Don't forget to select the instance and click on connect.
Step-9: SSH to your instance via PuTTY/KiTTY/GIT/ Good old cmd prompt
Use atleast one of below ( puTTYgen is important) Get puTTY => Here
Get puTTYgen => Here
Get KiTTY => Here
Get GIT => Here
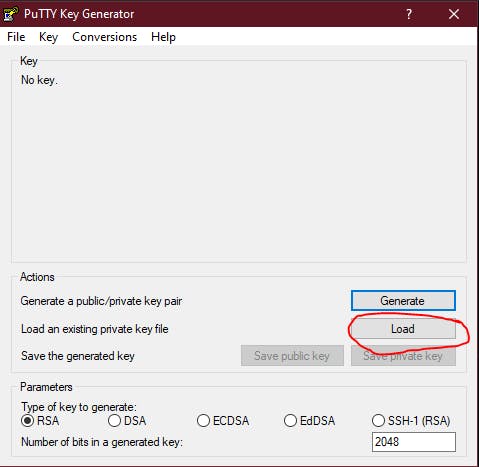
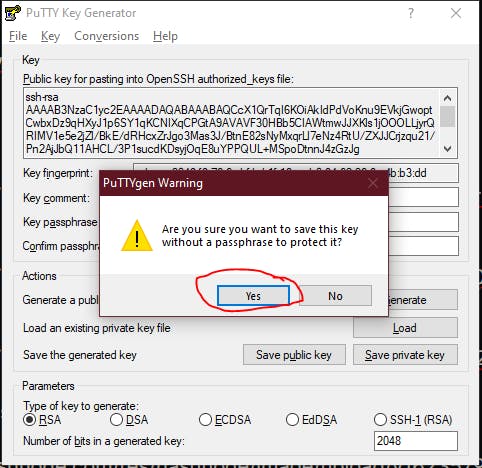
Step-10: Generate .ppk to use with puTTY or KiTTY (Very important step)
This is crucial step as if you miss this your virtual machine will be running but you won't connect to work on it.

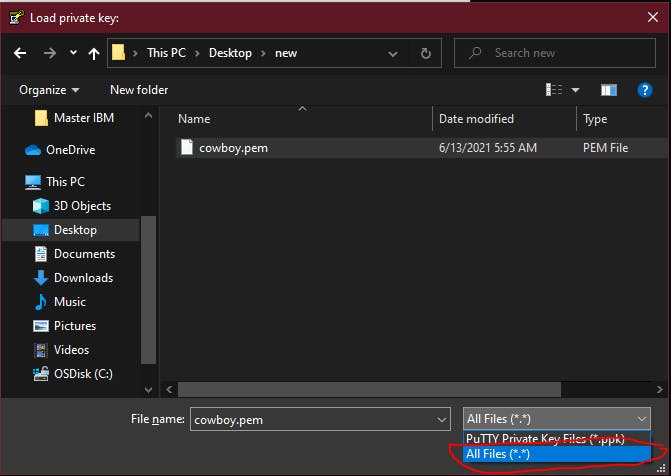
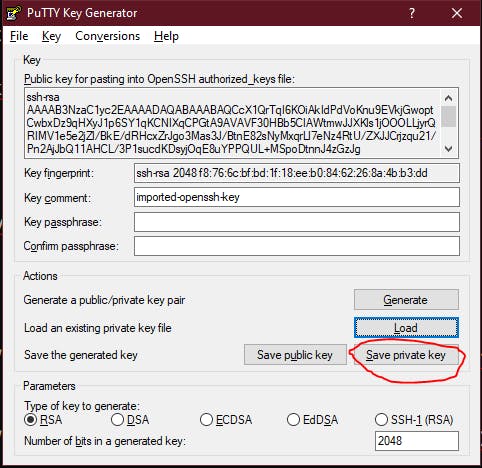
Open puTTYgen and import the .pem file
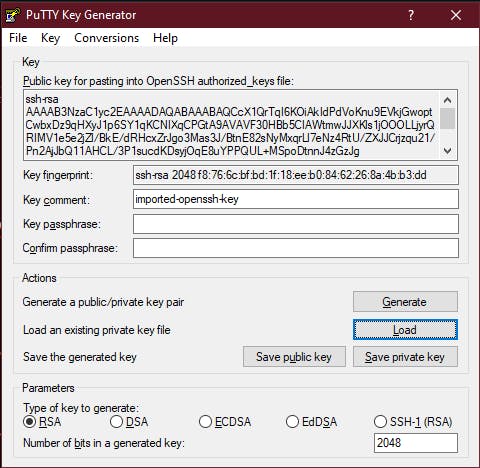
Save the .ppk file in your desired location
Step-11: Finally, SSH your way.
Copy the IP or DNS name from the AWS console.
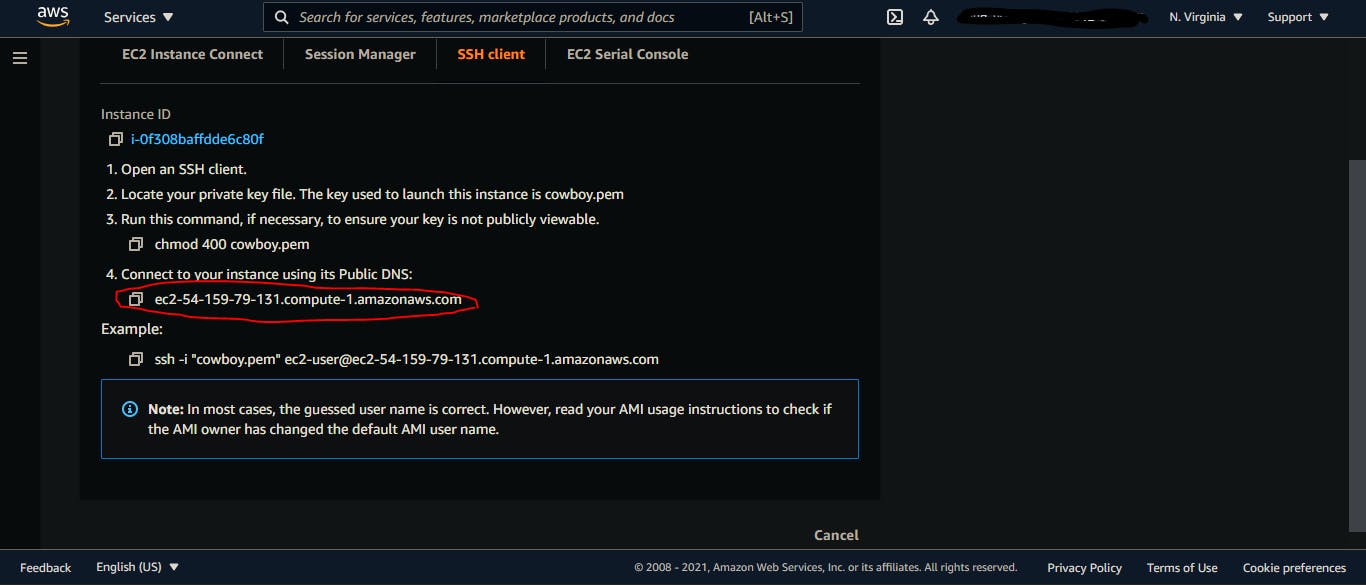
Open puTTY or KiTTY (kiTTY is a fork of puTTY so both are ideally same)
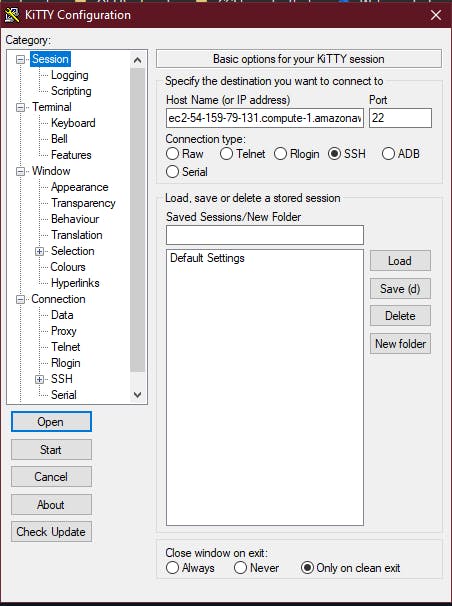
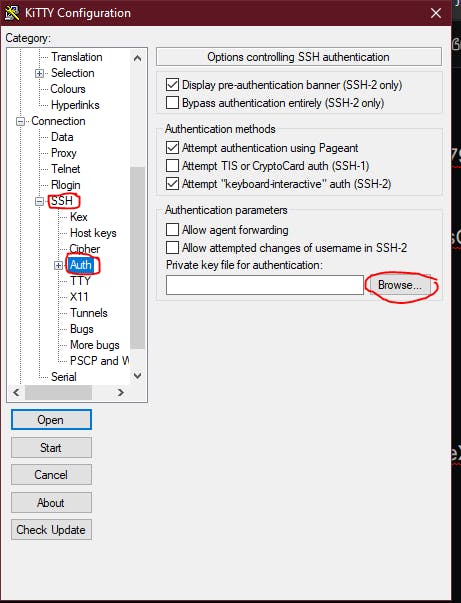
Step-12: Load your Key and login to Linux VM
Browse your .ppk key file and click on Open
If you see this dialogue box then you are successfully connected to the VM.
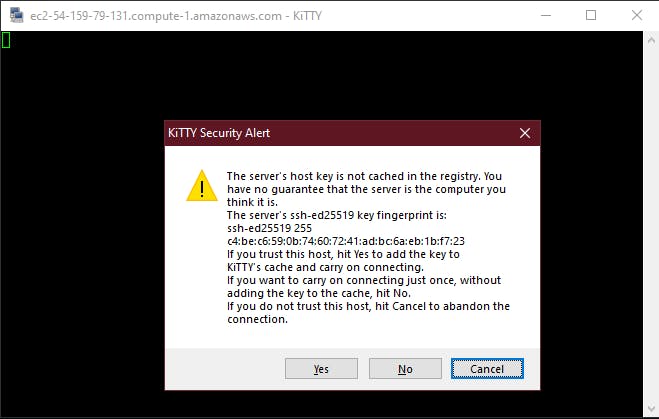
Now, don't panic and read the whole Security alert 😁
Just press Yes
Enter your login ID: ec2-user
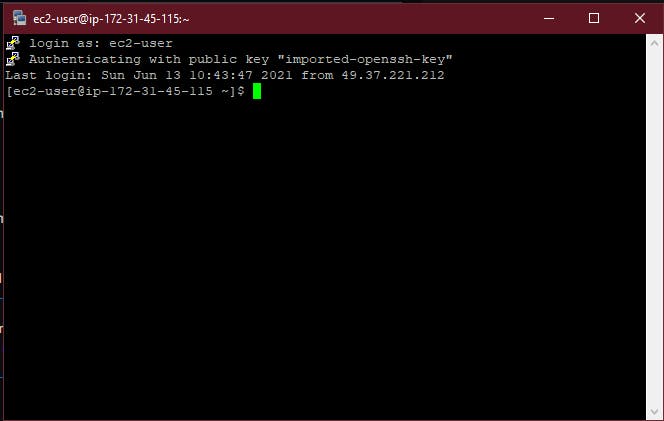
Finally!!! You done it comrade.... 😎
Step-9a (In other realm): Using cmd prompt/ GIT (Easiest way)
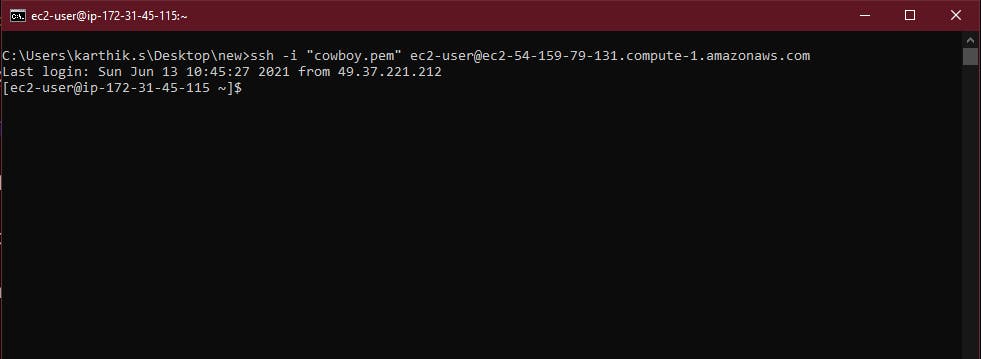
Copy the command from AWS console for connecting through cmd or GIT using the same .pem file
Tip: You must be in the same path as the .pem file
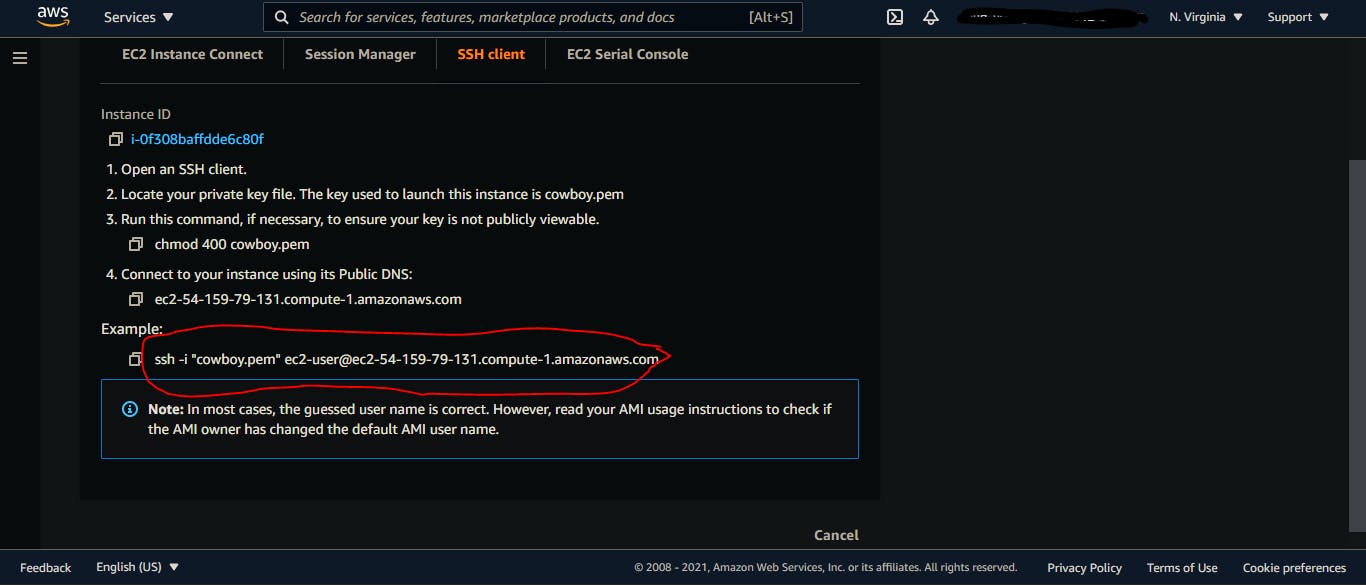
Open the good old cmd prompt and go to the path of .pem
Then paste this command from AWS console. That's it!!
The Steps are the same for all three Cloud provider, UI might change.
Pro Tip: Some think if you close the puTTY or SSH client session and think the VM is shut down. Which is like after you get out of the car and close the door, the car automatically stops and go to it's place (which is not yet possible😄). So, You must terminate your instance no other way.
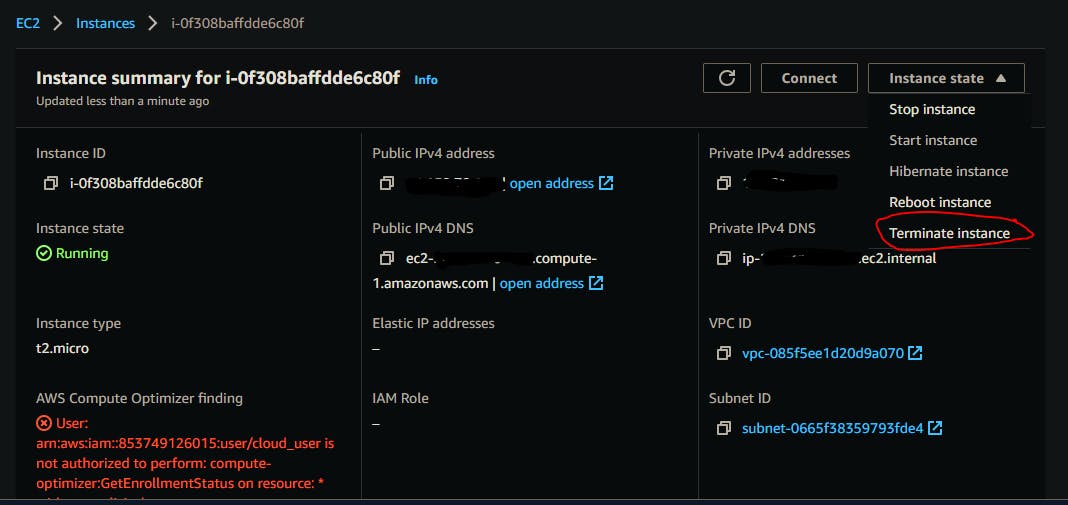
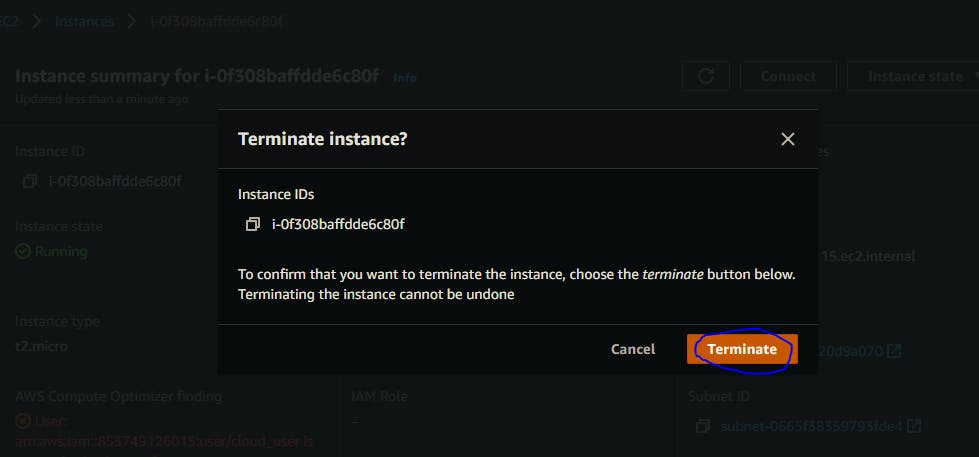
Final Step: Terminate your instance (IMPORTANT step of all)
Go to your AWS console and terminate the instance.
Timer is OFF

I will help you.
I have spoken